Jun 09, 2008
Okay - so I've been doing a bit of work recently and taking a couple of photos here and there as well.
The gearbox is fully painted in red engine enamel. I took my time in cleaning up the transfer case and box to ensure that I had the best surface to stick to. I can't be half assed as my expectations are high and my friends would constantly give me *bleep* if I didn't do the job properly from the start.
Understandably, there is a sense of high expectation as the boys have some very nice cars to compare with.
That and judging show cars for 3 years, you tend to notice where shortcuts have taken place and/or things could have been done better, so my mind is always thinking what is the "right" way of doing things.
I started on the box and case on Friday night. My friend Nish came around and we talked a bit on engine bays, Link LEM G3 options and wiring and he did a little bit of work on the box cos he felt like it (hey, I'm not going to complain if someone helps me out).
I used scotchbrite pads and a lot of degreaser and sometimes even paint stripper. Nish suggested the paint stripper as the paint stripper brings up grease and grime really easily and doesn't affect the aluminium (he works for bostik international - chemical product people so I could trust his knowledge) but I just made sure that I spread the paint stripper on large areas.
Of note, after removing the grease and grime build up, I found stress fractures and cracks here and there in the gearbox and transfer case. Can't expect too much after 18 years, but I'm confident that there will be no troubles for daily driving.
I ended up finishing cleaning up the box and case on saturday night at 4am after 3 days work cleaning up, removing 17 years worth of grime and built up grease on the transfer case. The box wasn't too bad as the team at Miles Udy Automotive put the box through their parts washer, but there were still areas that needed to be cleaned up.
I thought that I may as well spray at the time as I really really needed to get things underway with the build. I went over every part of the box and case with the wax and greaser remover and then I balanced the gearbox and transfer case on my work table, covered all the necessary areas in tape and proceeded to shoot up the first coat at 4.30am lol. (BTW, if you balance the box and case like I did, just make sure you don't bump the table. Its a pretty precarious position to balance up, though it sits quite nicely)
The next day I got woken up by my mate Jonno and felt like shite as I'd been pulling some late late nights (or early early mornings) and subsequently got back to work after talking some options with placement of catch cans and reservoirs to clean out the engine bay. I also got him to shoot a layer on the box as he is a better sprayer than me.
In the end, I believe around 5 coats have been laid down haha. This was between the normal household chores, and mowing the lawns on Sunday.
In the evening, I rested the gearbox right side up and shot the areas that were missed while on its angle. I did a couple or 3 coats on the areas missed while dismantling the engine.
As to the engine dismantling, a methodically removed all nuts, bolts, hoses, brackets, parts etc etc while documenting using a log book/photos and labelling everything that came off and storing the bolts etc in plastic ziplock bags. I finished up at 2am last night with still a bit more to go.
I rounded off one bolt on the turbo flange, so I had to stop.
Today I've been recovering and getting back the feeling in all my muscles and finger tips - sanding and scrubbing a *bleep* and I really went to town on the box and case as it was the start of the project. Something small to sink my teeth into lol.
There are a couple of runs, but nothing that can't be taken out with a bit of a wetsand.
It actually seems like everyone is willing to help at the moment. They all know that I'm dedicated to this build and my standard is high so they know that I want to do things right the first time. I have access to cabinet sandblasters, a wide range of tools and the advice of racecar builders, so I'm very very lucky as most things are a 5 - 15 minute drive from my place.
I was just around at Kat's place and borrowing tools and asking questions of Kat and his Dad.
I walked away with rattle gun, snap-on impact wrench bits, rounded nut removal tools, brake/fuel line flaring kit, pulley balancing/puller kit etc and asked a bunch of questions and was answered and advice provided (in the normal straight and very blunt approach of Tom with a bit of *bleep* thrown in lol).
If you want to know the *bleep*.. basically it was "why didn't you just send up the engine to Kevin, spend 7k and get a race engine in a crate in 3 weeks cos its a lot less hassle instead of *bleep* about with what you say is a better engine" hahaha. Gotta love the constructive criticism.
Basically i had the option with the old engine to send to a race car/engine builder 600km away and get a full rebuilt engine with all forged internals, overbore etc etc and not mess around with stuff.
But then again, the st205 engine has the upgraded oil pump, better cams, turbo, better oil system (i did seriously debate a dry sump, but since I'm not racing, it was like whats the use of that..) etc etc so I'm still happy with my purchase, though I will get unremmitant grief from Tom of not getting the engine rebuilt.
So now, its just a matter of a quick clean up of the garage, getting the flywheel off, getting off pully wheels, removing old engine off stand, putting new engine on stand, removing other stuff and figuring out what can and can't be removed.
Then its simple green in the engine bay with degreaser, removing lines and ancillaries and then removing the dash and old wiring and prepping for the new wiring and possible some other little things as well.
Apparently I'm going to be spraying my own engine bay

Jonno and I were talking options for the car over lunch and apart from rerouting all the lines and hidding reservoirs etc, I talked about the seam sealer in the bay and cleaning up, or going reasonably hardcore. I am now going hardcore..... oh *bleep*! haha
Cleaning up the bay, deleting holes and filling them in etc etc. Use etch primer, then lay down new seam sealer and look at shooting my own engine bay.... Looks like I'm going to be rather busy!
That and I'm on a Link group buy, so that will be in a couple of weeks and I'll be hardwiring up the link as I'l be running seperate gauges and minimising a wide range of electrical connectors and stuff in the bay.
Speedsource bits arrived in mail the other day. Exhaust I need to rearrange delivery for as I missed the other delivery. I believe the shortshift kit from TWM is at the post office to be picked up. ASI radiator arrived last friday.
Still need to order a bunch of things - new oil and transmission radiators, hoses and braided pipes and fittings.
Pictures up later, I have to remove a flywheel, clean the garage and move engines around the place

As you can see, a whole bunch of grease, grime and work to be done. Some of the build up was 3mm thick

Nish cleaning up an easy part lol

As you can see, he didn't do much.. like a 50mm x 100mm patch haha

Progress getting made!

I had to orientate the gearbox on all sorts of angles to be able to clean it.

Some of the micro fractures in the metal and some casting crap

Cleaned up with a dremel nicely though

More cleanliness

Doesn't photograph well with a flash haha

Balanced amazingly

More micro fractures and a crack in the diff case. It "should" be okay *fingers crossed

Ready to spray

All important bits covered up

Jonno the next day shotting a layer in the morning before lunch


Looks good in the light

Covering up in preperation to spray over the missed areas.

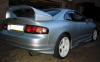
This is my mate Jonno's car PhatRS just before Autosalon Christchurch 07


_________________
GT Four
Adovansu
"I want to enjoy the powerful and nimble agility behavior."