www.gt4dc.co.uk
http://www.gt4dc.co.uk/forum/

The Winter Overhaul...
http://www.gt4dc.co.uk/forum/viewtopic.php?f=1&t=3293
Page 6 of 9

Author:  toyokid [ Sat Sep 04, 2010 11:04 am ]
Post subject: 

Hello Mook
Do you have any comparisons of Garrett v Hybrid?

In retrospect would you fit 264 cams on a road car again?

Curious.

Stephen

Author:  mook [ Sat Sep 04, 2010 10:03 pm ]
Post subject: 

Hi Stehpen,

Unfortunately I have no comparisons against a hybrid, I went from stock turbo to TD06 to GT3071R, it's much better than the TD06 for road use spooling up that much quicker but it's still a little more laggy than stock.

As to the cams, I probably would yes. Had 256 degree cams added to the Rover and it made it breath much easier without affecting anything at all. These 264s are higher lift but it's not lumpy by any means and Adrian did comment on how smooth it was whilst doing the mapping.

If I was doing it all again, I'd have stopped modding ages ago *lol*

Author:  mook [ Sun Sep 05, 2010 9:41 am ]
Post subject: 

Quick pic of the relocated solenoid, got it down under the start motor so there's very little vacuum pipework now, keeps things a bit more under control :)

Image

Also made a start on my new 'boot build'. Have made up a new platform on which the battery and powered sub sit on and got it wired in (albeit a bit of a mess of wires at present which need tidying up). The top of the battry and sub are positioned about 10mm from the back of the seats and the sub also sits 10mm from the strut bar - perfect fit. I have a 1.6 farad cap which can sit infront of the sub on the platform to keep things in check :)

Need to box it in now. Was going to use some carbon paneling but decided against it - would need a reasonably chunky framework made up for it so I might aswell go for mdf, again only 9mm thickness, and cover it in carpet. I'll then add a raised carbon panel to the back on which will sit some Skewer graphics and under which I'll put soe white LED strip lighting which will shine out around the sides and act as the boot courtesy light.

I might also ditch the spare wheel and go for a flat floor, saves weight and gives a bit more boot space back, just need to get a can of tyre weld :oops:

Image

Image

Image

Author:  mook [ Mon Sep 06, 2010 10:14 am ]
Post subject: 

False wall and new boot are now inplace! Pretty pleased with the results. Removed the spare wheel in order to get a flat floor and remove a touch more weight. I'm happy with the fit and finish - aside from a fold mark in the carpet but that should come out over time.

Image

Image

Image

Image

Image

Bet you've never seen a plainer boot build *lol*

Author:  two_OH_five [ Mon Sep 06, 2010 11:12 am ]
Post subject: 

Now that' a tidy install

How's it sound?

I've been meaning to sort out the heap of subs and wires in the back of mine but after doing so much to get the thing moving again and the ongoing battle of keeping 3 old wrecks on the road reserves of bovvered are low :lol:

Author:  mook [ Mon Sep 06, 2010 7:26 pm ]
Post subject: 

Ta :)

Used 6mm mdf for the box section and wall so it's not too heavy. Accoustic carpet to cover both. Floor has some noise absorbing foam under it (the like of which you see in aluminium cases holding the bits that make up a rifle!) and then there's a second smaller piece of 9mm mdf covering the hole of the spare wheel. Not too much weight all in all.

Just set up the audio with the new headunit and it's not too bad, not a thumping competion system of course, but ample for my needs. The headunit also has control whereby you can specify the size of front, rear and subwoofer speakers, which is nice.

Only problem is I have alternator noise coming through, even though I've added a noice supressor, think the whole lot could do with re-wiring, much like the main loom!

Author:  mook [ Wed Sep 08, 2010 10:04 pm ]
Post subject: 

As well as the interference I've also now noticed the limitations of the componants, so I'm thinking of upgrading those too - might go for Vibe Space ones, can get the 6's up front and 5's in the back.

Anyway. Got the new chargecooler pre-rad through today. The thing's humungous!! Got some adapters with it so just need to sort the hoses out for plumbing and then sort a mounting bracket for it - luckily there's plenty of room infront of the main engine rad for it and it's only 180mm tall so wont take up much height and I can keep it lower down. Also comes with a handy drain tap and mount for a temp sensor should you wish to fit one :)

Image

Image

Image

Author:  mook [ Fri Sep 24, 2010 10:15 pm ]
Post subject: 

Got another mod underway now aswell, never ends...

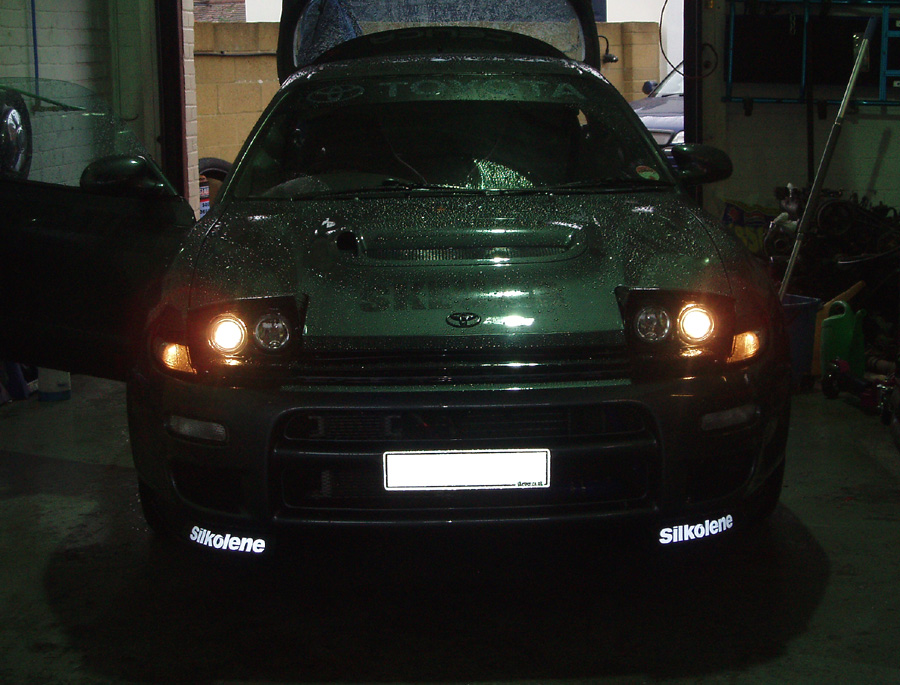
As I have the Neeltec quad pop ups with projector dipped beam units I decided to get some HIDs. Ever since I had the S15 with them I knew I'd get some for this as the light output is just top notch. Got an 8000k conversion kit from hids-direct.co.uk which arrived the other day.

So, made a start on fitting them this evening. Took me a little deduction to work out how to wire the thing in for a start, instructions weren't abundantly clear! Still, got one side wired and lit so I can see how it looks...

Superb!!! It's going to be great. The 8000k colour matches the sidelight LEDs perfectly and it gives a superb amount of light.

Here's pics of it being fitted and the comparison between the old and the new, couldn't believe the difference :D

Image

Image

Image

Image

Should get the mounting of the ballast unit and voltage correction unit sorted tomorrow all being well, think I need to get the bumper off to get in there properly.

Author:  mook [ Thu Sep 30, 2010 8:27 pm ]
Post subject: 

Right, all fitted. Got a quick before pic when the Nelltec lights were first fitted, followed by the new ones with the HIDs (and LED sidelight bulbs), you can really see the change from yellow to white :)

Image

Image

Image

Image

Just needs a little tweeking with the direction but it's 99% sorted. Damn pain to adjust mind!

Author:  toyokid [ Thu Sep 30, 2010 10:36 pm ]
Post subject:  Dry today

Hi Mook

Just noticed this on Ebay
http://cgi.ebay.co.uk/ws/eBayISAPI.dll? ... K:MEWAX:IT
how does it compare with your front radiator?
How are you getting on with the install?

Stephen

Author:  mook [ Fri Oct 01, 2010 4:02 pm ]
Post subject: 

Looks okay, don't know too much about the ins and outs of intercoolers. Most intercoolers are similar dimentions, with this pre-rad I like the fact it's thick and not too tall so it doesn't take too much of the direct airflow away from the engine rad :)

Not got it in yet, that'll be sorted later in the year when I get the underside cleaned up and sealed again.

Author:  mook [ Wed Oct 13, 2010 12:54 am ]
Post subject: 

Right, got the basic idea down for the new graphics, for the sides at least - bonnet, roof, spoiler, tailgate/bumper still to do.

Opinions and suggestions welcome...

Image

Author:  mook [ Fri Oct 15, 2010 11:49 am ]
Post subject: 

Finally got some pics of the exhaust after a few little tweeks to remove some knocking and get the angle of the backbox just right. Keep in mind that the underside of the car needs a good clean up and underseal again, subframes and so forth are due to come off, be shot blasted, and powder coated if keepable, otherwise replaced with new bits. I'm also going to tidy up the fuel tank cover, may even skin it in carbon...

Image

Image

Image

Image

Image

Image

Author:  two_OH_five [ Fri Oct 15, 2010 12:22 pm ]
Post subject: 

Well it is winter again, time for the next set of mods :lol:

That chargecooler rad looks very nice. Haveyou had a chance to check and see if inlet temperatures have changed at all?

Author:  mook [ Fri Oct 15, 2010 1:42 pm ]
Post subject: 

*lol* Yeah, winter again, might finish the mods this time round ;)

Not got the new cc rad on yet so not had a chance to check temps. Havn't got a gauge for inlet temps either, info is in the Motec but I still havn't been able to get to it!

Page 6 of 9 All times are UTC + 1 hour
Powered by phpBB® Forum Software © phpBB Group
http://www.phpbb.com/