Before treatment

After treatment
Submitted by - Rhino
This article is intended as a helpful guide and shows how to service your ST165 windows. If you are in any doubt, or not qualified, do not undertake this work, consult a qualified mechanic. The author or the GT4 Drivers Club can not be held responsible for any loss or damage resulting from use of this article.
The front windows of my car had become quite scratched from 18 years of going up and down; I decided to replace them. Also, my electric windows were loose, noisy and slow, and the door weather-shield had also seen better days.
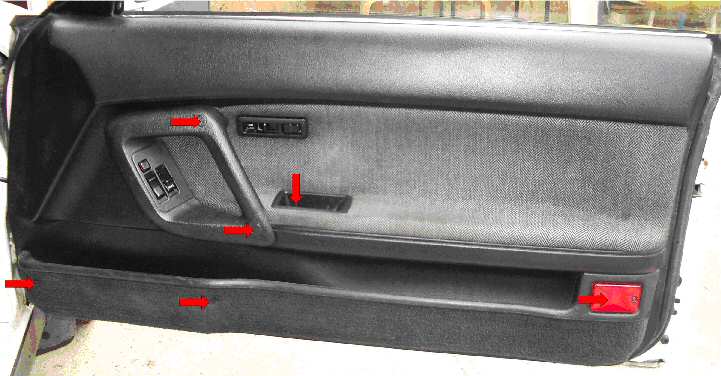
There are fixing screws at each of the highlighted locations. Remove all of the screws, and then starting at the bottom and working your way up the sides, pull the door card gently to release the ‘poppers’. The door card will now just lift free; unplug the electric window control and place the door card to one side. Unscrew the electric window control from the door card and re-attach to the car; you will need to be able to raise/lower the window throughout.
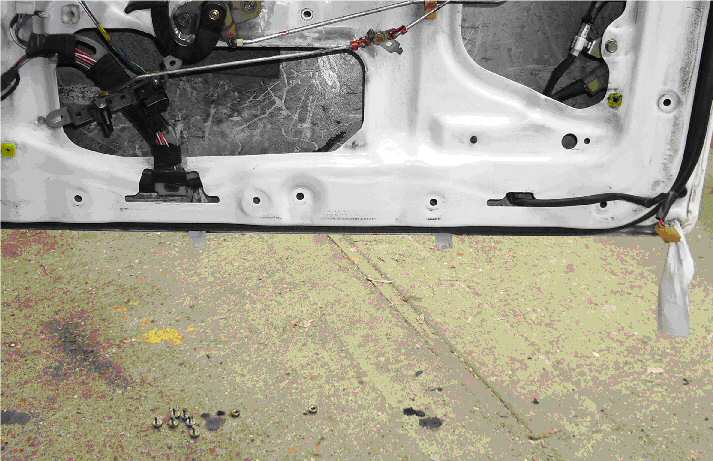
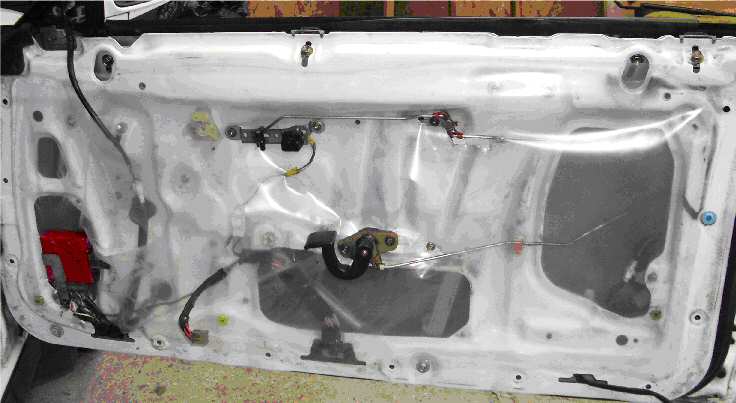
With the door card gone, you’ll be looking at something like this:-
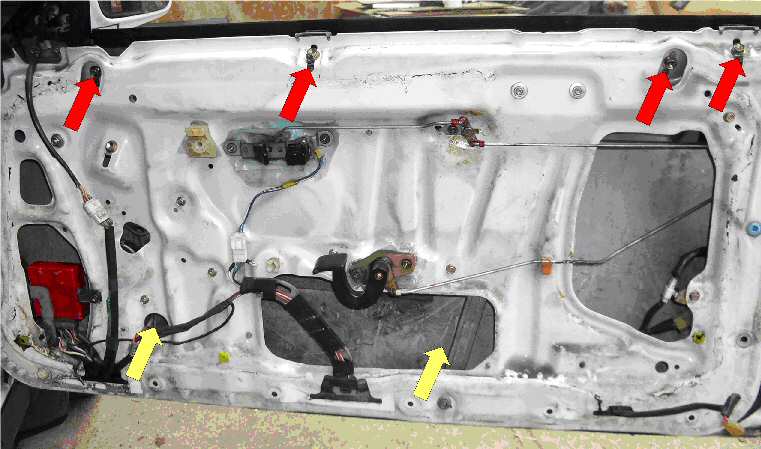
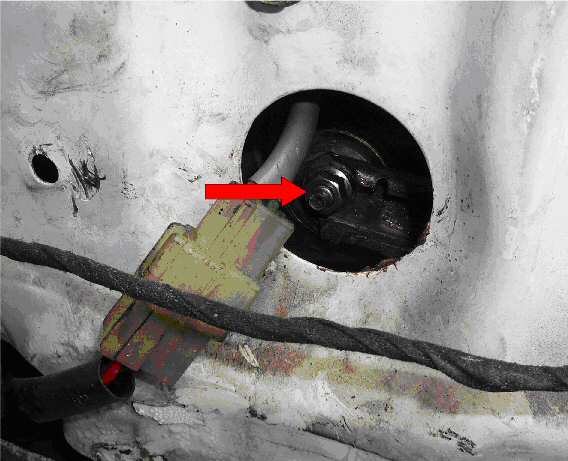
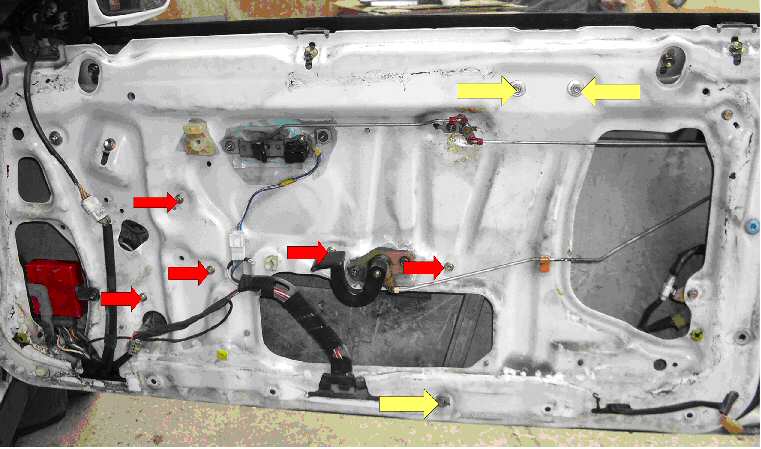
To get the window out you will need to remove six fittings. The red ones are quite easy and are best done with the window down. A bit of twisting and force will see them defeated. The red four will look like as below:-
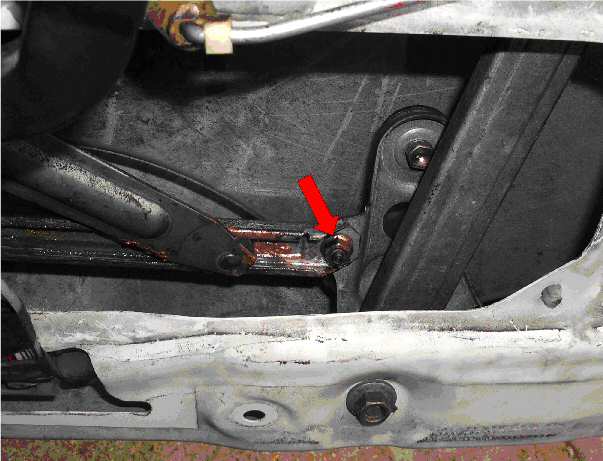
The yellow ones (nuts not visible in the image but the arrows illustrate where the nuts will be when the window is raised a little to allow access) are very easy as long as you raise the window a little to allow access. The images below show the two nuts in question:-
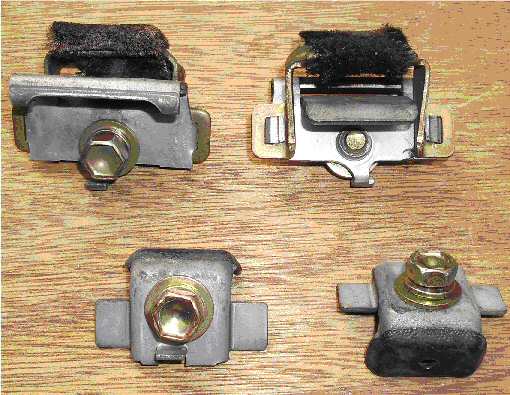
With these six fittings removed the window will pull up and out relatively easily. To put in new windows all you need to do now is take all of the fittings off the old window, and fit them to the new window.
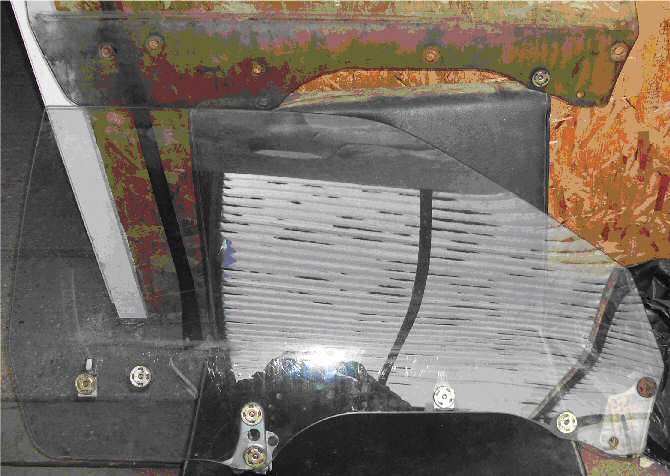
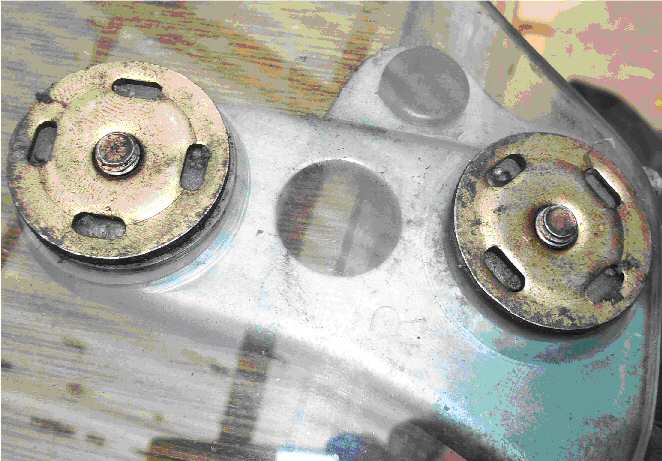
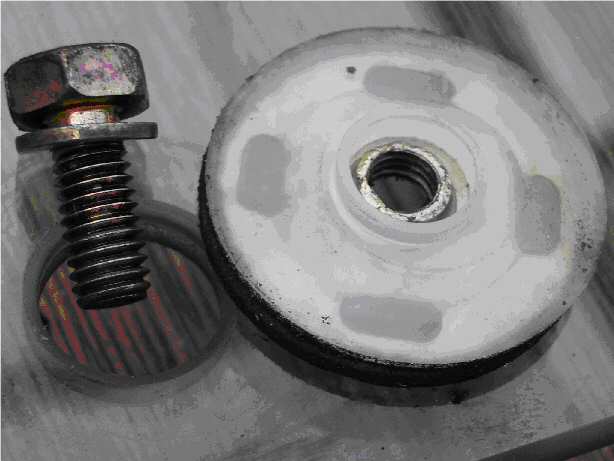
It is an easy job to get the fittings off the old window and onto the new; one of the fittings (see top window far right) cannot be removed AFAIK, but my replacement windows came with this fitting already attached so it was no problem. The pictures below show both sides of these fittings
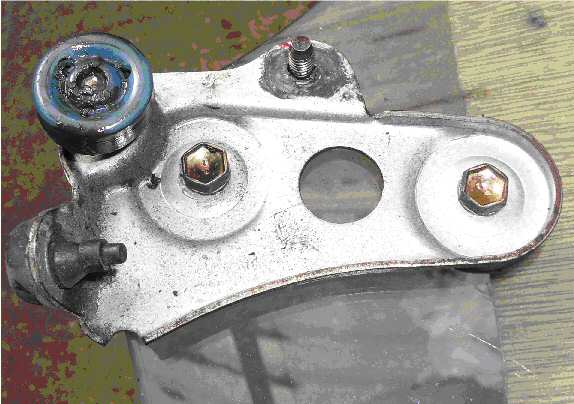
When attaching the fittings to the new window it is worth knowing that the holes in the glass are bigger than the ‘shaft’ of the fittings, ie the fittings can ‘float’ within the holes of the glass a couple of mm around before they are tightened. If all of the fittings are tightened up against the top edge of the hole in the glass the window might not contact the rubber seal of the door frame properly and thus allow water to enter the car. For this reason I tightened all of the fittings against the bottom edge of the hole in the glass (as close to the bottom of the window as possible) and in my case the windows make a tight contact with the rubber seal.
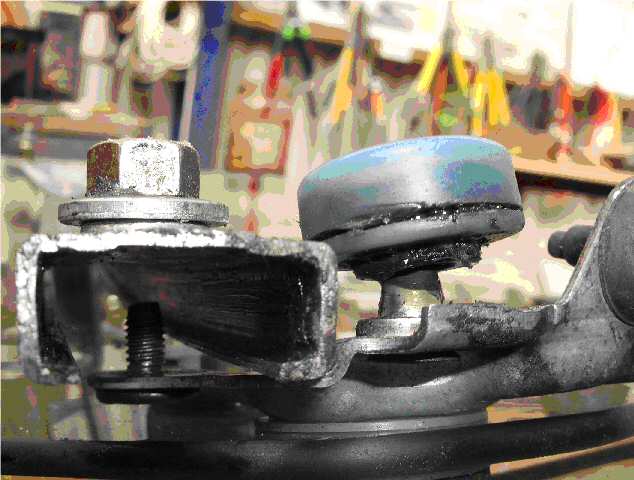
Once the new window has all of the fittings attached, it is simply a case of ‘dropping’ the window in and refitting everything in the same order as it was removed. The little wheel that runs within the window guide is worth a bit of attention though, as it is possible for the wheel to sit incorrectly within the guide, as was the case with mine. Instead of running within the guide it looks like it was running along the lip. I think it was this that led to a slow and noisy movement.
Once I had removed my window I decided to also remove the mechanism, and grease the moving parts. To get the mechanism out I first removed the window guide (3 yellow arrows) and the mechanism itself (5 red arrows):-
All of the parts removed will look something like this:-
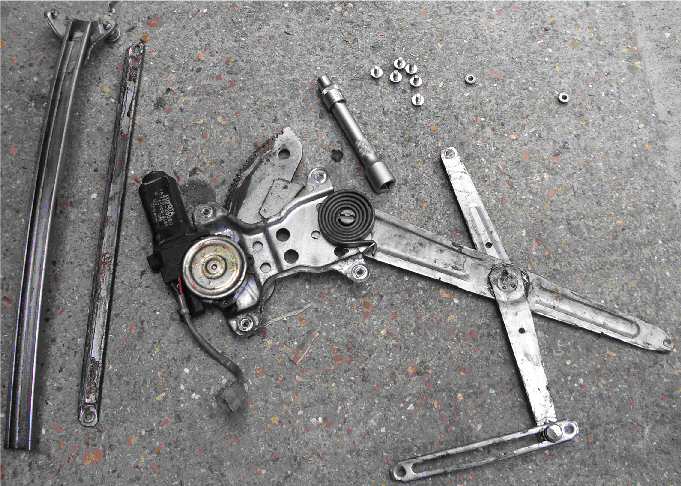
I cleaned and greased the moving parts and set the mechanism to one side. I thought that whilst the window was out and the mechanism removed it was the perfect time to waxoyl the inside of the door.
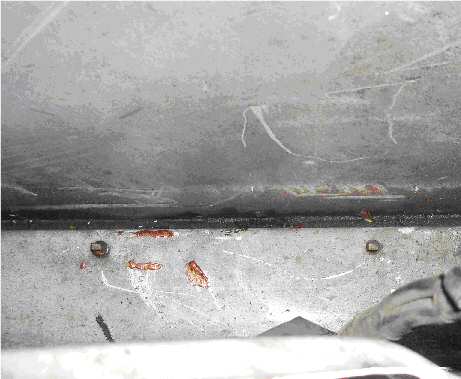
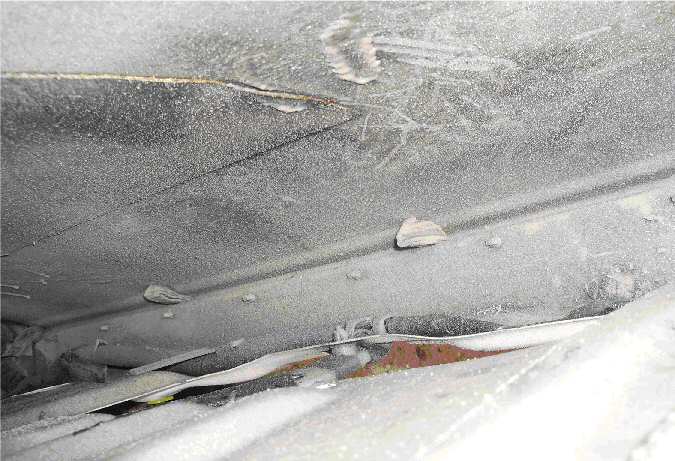
The key to doing this properly is to remove all of the dirt and debris that has gathered at the bottom of the door. These pictures show the bottom of the door :-
Before treatment
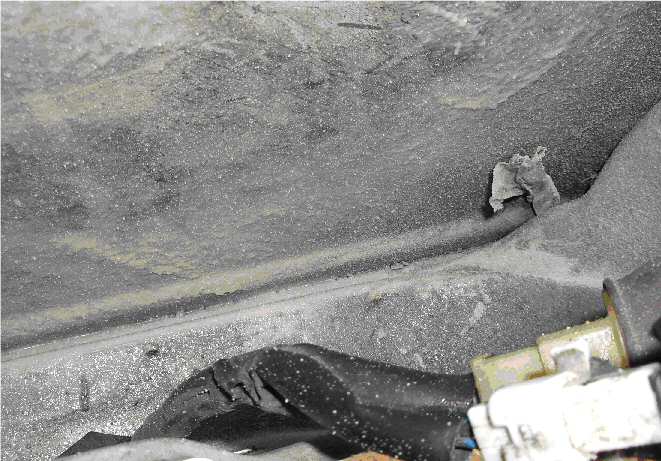
After treatment
You can see that as well as removing all of the crap, the drain holes are also much clearer and therefore more efficient. I used petrol and a small paint brush to clean this hard to access area. When you have given the petrol a few hours to clear it is time for the final prep before applying the waxoyl.
There is no value in blocking the drain holes with waxoyl; this will simply prevent water from draining and will probably promote rust rather than prevent it. To ensure the drain holes are not blocked with waxoyl a good method is to pre-block them with cloth/b tissue bungs before applying the waxoyl, and then (once the waxoyl is set) pull the bungs out.

Once the bungs are in place, it is time to apply the waxoyl:-
Let the waxoyl set, and then remove the bungs by pulling downwards.
Everything can be put back together now in the order it was removed. Before refitting the weather-shield and door card it might be worth checking that everything works as it should, and that the window when up makes a good tight seal with the rubber seal around the door.
A new plastic weather-shield can be fitted to prevent water entering the car and or soaking into the door card. I bought some plastic damp-proofing for use under lino from B&Q; it seems to have done the job:-
If your old plastic weather-shield is in good enough condition it will be far easier to reuse it.
Good luck and don’t have too much fun!
Rhino