I feel its important to chuck in a mix of stuff while I do my thing.
Gives you an indication of other friends progress and project evolution while I do my thing and highlights where I get my ideas / critique / motivation from

You've already seen Jonno's stuff in the past so time for a new project to have a look see
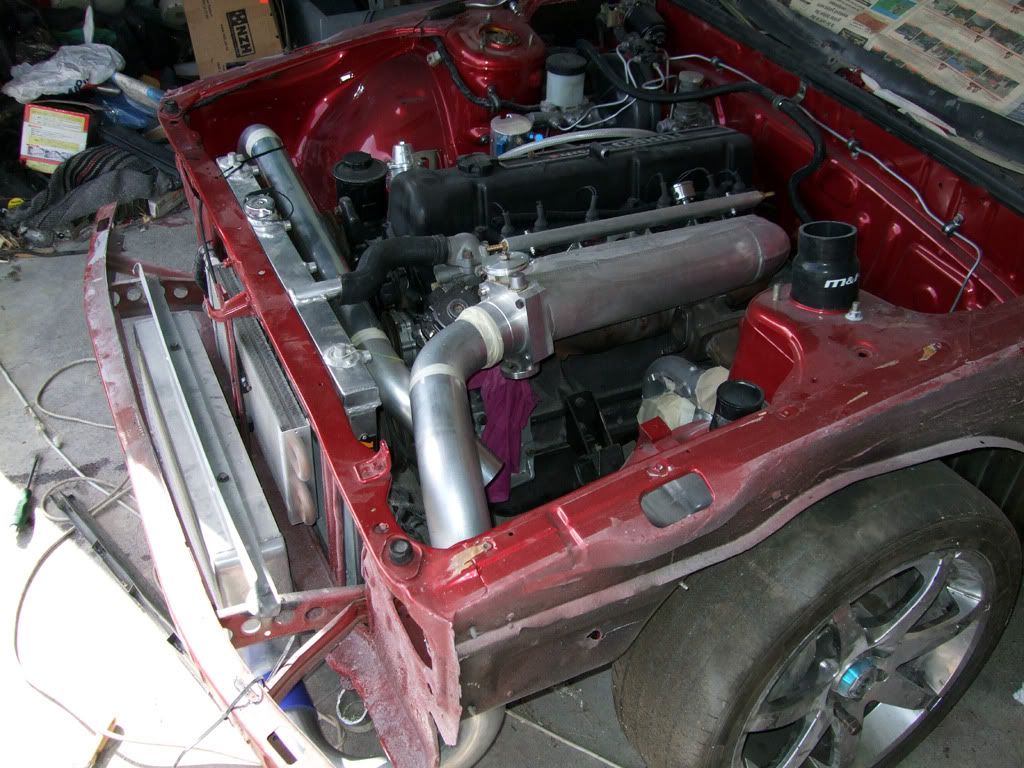
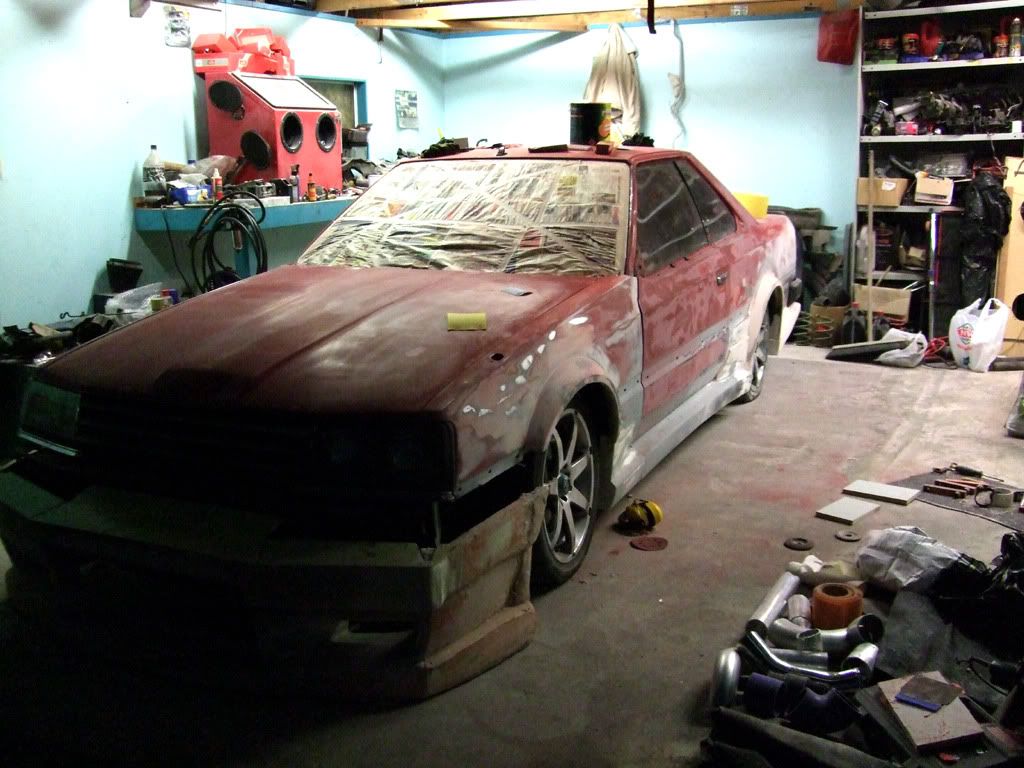
Every once and a while, I go over to my friend Nick's place to either help on his project or use his sand blasting cabinet.
This is a R30 Skyline coupe that he is building up

Runs an L28 with Holset HX40. I have the fun job of wiring in the Link and fixing up the alarm later *sigh.


One working bee day, I spent the whole time just cleaning his garage and sorting out his mess! Yes - I'm a nice guy

Check his build on jap nostalgic car
 http://japanesenostalgiccar.com/forum/v ... sc&start=0
-----------
Sometimes I go over to Leigh's place to borrow tools or get him to whizz something up for me.
This time around, I found that my vice was marking up the engine mounts I was cleaning up. I remember him talking about "soft jaws" so I rung him up and he said he used aluminium pieces to make "soft jaws" for his vice.
So popped over and he was rebuilding his car trailer. Various changes and welding all done up - looked pretty good

. Apparently the next trailer will be a modular job that will have a tip mechanism as well be able to turn the trailer into a horse float as his fiancee's rides.
So after discussin the soft jaws, he quickly cut up his bits of aluminium (while in socks) and gave me he offcuts to use. Apparently there are more suitable pieces around, its more a matter of finding them.
I left him to finish up the trailer while he was wearing his safety jandels, while cutting up steel and welding..

-----------
Back to the elephant

After going to Nick's place to use his sand blasting cabinet, i had some slightly better mounts.
The issue with snad blasting is that it reaches hard to get to places, but takes a lot of time. It is hobbyist stuff after all. That and there was no moisture filter on the hose as Nick was running my compressor and his in parallel for his work on the skyline. Gar!
So I decided to attach my metal bits and bobs with the wire brush attachment. Trick - go clockwise and anticlockwise to make the attachments last longer. Also, I found that going anticlockwise was the best way to remove paint and rust build up while slowly and lightly going over pieces. No need for hard pressure, just a steady hand over the object.


initially the gearbox mounting plate was left in malt vinegar to remove rust, with sand blasting afterwards. As you can see, once the rust was removed, pitting is evident. I'm not caring about the pitting so much as the rust removal.

Rough casting left little bits of metal around. A quick file cleaned that up easily.

Shiny! Bling


A arm mount getting the big clean


The ST185 mounts are, well not exactly the most desirable things in the world.
As countless people have upgraded their mounts using polyurethane or inserts, I purchased my poly mount set for the front and rear mounts from speed-source ->
http://www.speed-source.net/ . really great guys who answered my questions and i bought a bunch of kit from them. Of note, because it's east west layout, the side mounts are just for holding the engine in position and the front/rear mounts are the stablisers for when the engine moves in position when the torque is applied (i'm sure you know it, but I learnt it by asking q's and its part of the story

)
While I was on one of my journeys to Pick A Part, I noiticed something shiny in the engine bay of a st182. It was the drivers side engine mount. My rubber bushings were the worse for wear so I decided to get this shiny one (as I was going to polish mine anyway) and found that the st182 unit had more urethane in them. So why not get it?! It was shinier after all

So after 3 hours work to detach the engine and raise it up, I had myself a $8 ngine mount

So much work for such a small part. Subsequently, I got the passengers side mount as well, which took all of 15 minutes to get out. The gearbox mount fits onto the gearbox mounting plate


Of note, the offset of the shim is slightly different between the st182 and st185. The speed source poly mounts are also offset. Not to mention that the aluminium cross member bushings also lower the cross member frame lower as well. Hopefully it all lines up nicely at the end of the day.

Wire wheel cleaning up things nicely. Remember, slow and steady is the key


Underside of the gearbox mounting plate.

Ah the amp rack paint booth

taped up and ready to go


And a test of spacing for the hangers. The hangers are bent in such a away to allow me to pull them off while still keep the the to be painted piece further in the booth. Worked out great


Wax and grease remover and ensuring cleaning in all areas

Taped up

Etch primed up. I went etch and then sprayed with Bright Zinc-It. Only after did I realise that etch already has zinc in it

Oh well, all part of the learning process. I used some chrome look paint I found on the other side of the garage to make it a little shinier than the bright zinc.


The front and rear mounts. Internals are to be replaced with the Speed Source poly mounts.
Now I do have access to presses, both friends and the neighbours workshop. But in my "f it, i'll just get into it, I followed Speed Source's guide of sectioning the metal and then removing the mount.

Taking the blade of the hacksaw and inserting the blade into mount gap, I carefully saw out the inner metal. Patience was taken to ensure I didn't damage the outer mount metal too much.

Moving forward from Speed Source's guide, I actually sectioned two areas out and folded the metal in between to create a larger gap. Of note, I had to actually cut at 3-4 places to make the inner shim mount loose enough to hammer out.

Folded back using a screw driver and hammer - slowly but surely


Tap out inner mount piece by applying tapping force around the circumference of the inner mount shim.

Easy does it - don't need to damage the external mount piece.

Ta Da!. As you can see, it takes a bit of metal removal to get it out.

The first one came out easily. The second one, not so easy and required a lot of mangling and removing the centre section first. Easiest way to remove urethane was to use the hacksaw plade to cut through the polyurethane.

While on mounting, the crossmember was covered in grease and grime. Some degreaser and a hose cleaned up a bit of it. I'll come back to it later. Work in progress.

Painted passengers side mount. Not bad looking aye? A little paint overspray past the tape, but can easily be sanded off.

My pretty Speed Source mounts. Because I (and friends) played with them initially, they became mismatched. So when I was test fitting them, one unit sat freely in the engine mount bracket and the other one didn't. That was until I noticed the numbers and figured out that there was. maybe a 1 - 1.5mm difference between two of the mounts. Poly 4 + poly 4 = one mount. Poly 2 + poly 3 = the other mount


Nice


Engine brackets not painted, just cleaned for now. Will sort those out later.

St182 mount on left, st185 mount on right. Milled mount on st182 + more urethane.

I borrowed jonno's bench grinder and bought a sisal polishing wheel. I started on polishing, but am finding that it would be easier to sand back the casting and then polish later.

Mounts etch primed. Oversprayed one, so will sand back and clean up before painting.

_________________
GT Four
Adovansu
"I want to enjoy the powerful and nimble agility behavior."


